BeagleBone Green?

Interesting Beaglebone news: In one of SeeedStudio‘s latest blogposts by Eddie Hu about RaspberryPi alternatives there is a competitive analysis with an interesting item. There seems to be a plan within SeeedStudio to release an alternative BeagleBone with Grove sensor connectors, with the (code)name “Beaglebone Green”.

BeagleBoneGreen Announcement?

And for better visibility I will zoom in:
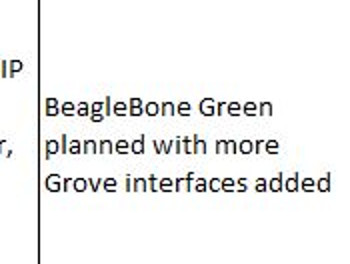
Zoomed-in text

The Grove line of products is a set of breakout boards with standard connectors to Analog, Digital, I2C or UART. Most of these tools are sensors and the add-on boards to Arduino, Raspberry Pi, and other small computers. Their site already lists 156 products.

Technically, one of the best boards for the purpose of using a lot of their sensors at the same time is the BeagleBone Black. Their board has specifically added things like analog i/o and real-time processors so no extra Arduino is necessary, like on the Raspberry for instance. The only problem is the intimidating expansion ports that most of the time just work as side bumpers. They do that job very well by the way 🙂

The people at SeedStudio already made a Grove Cape for the BBB, but that is almost as big as the BBB itself, and seems not to adhere to the cape instructions as it has no EEPROM to provide setup info. It also has only two Analog(dual) ports, two UART ports, and two I2C ports. As most Grove sensors only use one of the analog ports, it can get full rather quickly, unless you mod the cables yourself. The digital ports are easily reachable from the GPIO itself, but that is beside the point with Grove modules. All that could be solved by a BB version with a lot of adapters built-in.

So SeeedStudio adapting a BeagleBone to become extra Grove friendly would be a huge boost to the usability for hackers prototyping new ideas with their system. Add to that the possibility that people could add a lot of tutorials to that base, moving the Grove Wiki documentation from mostly Arduino based, to BeagleBone Green based. As prices for ARM based development boards keep falling, the competition to dethrone Arduino seems to be mounting.

We asked about it on the blog yesterday, the post was moderated, but no more info was given. Maybe more will be known soon, there is a mail gone out to ask for more info.
We will also ask someone within the BeagleBone project for more info.

I could not find more info on search engines, maybe you all could do better?

I’m looking forward to it 🙂

Update:(2015-01-29) I got some answers from the SeeedStudio people, they confirm they are working with TI on the a BeagleBoard Green, but haven’t got approval yet. They are sample testing now, and hope to sell the boards in May of 2015. I have asked for more info, but there was no reply yet (two weeks, so chances are low).
The people from Beagle/Circuitco haven’t replied yet (also two weeks ago) or acknowledged receipt of my mail. Maybe I should do a follow-up mail?

Update 2:(2015-02-04) I met someone from BeagleBoard.org on IRC, and he did not want to “give details they aren’t giving about their product”, but explained there are other boards in preparation based on non-BeagleBone designs, and that “BeagleBoard.org is very interested in having people clone the design and trying to help promote those clones”.

“The design is open, so ultimately they can do what they want in terms of product development. Details around branding are still being worked out.” So for now there is no decision on using the BeagleBone name on non-Beagle designs. The “BeagleBone compliant” badge would be only for direct clones, so other designs would need a different badge. For more on the organization’s view on the BeagleBone design, see the talk (video) from Jason Kirdner of BeagleBoard.org during the OHS Summit 2014 in Rome.

As an example of their cooperations he referred to the upcoming Arduino Tre a cooperation with the Arduino team that should arrive soon, and also another board that is under development, the BBP, which seems to be a BeagleBone for Reprap, designed by Truby Zong. An eventual release date is still unclear.
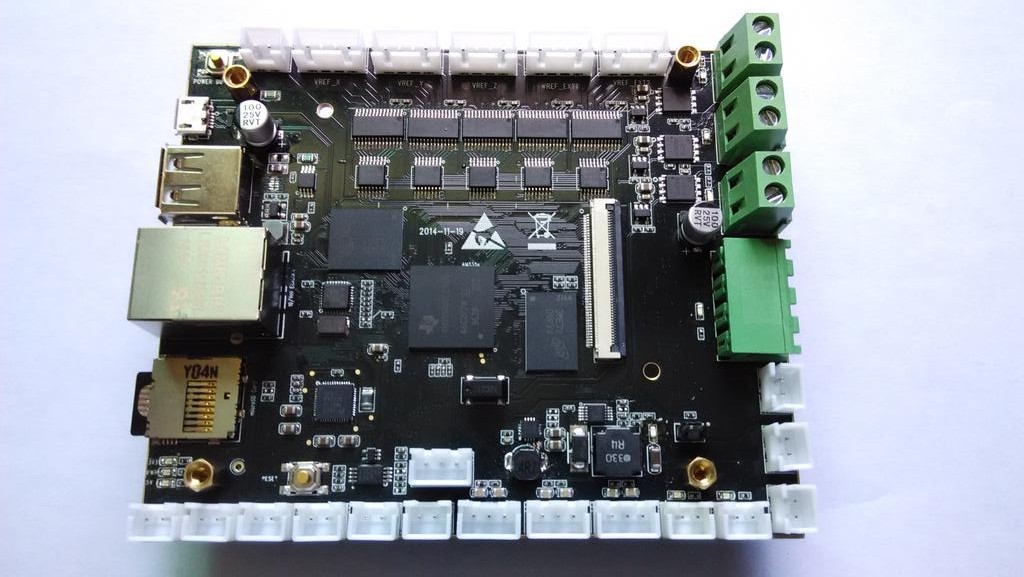
A view of the prototype BBP

As Truby describes it himself:
BBP BeagleBone 3D printer control board:
1GHZ AM335X
5 stepper motor drivers
3 MOSFETs for 2 extruders and 1 HPB
6 MOSFETs for Fans or LED strips
6 endstops

Also there is mention of a new board from BeagleBoard.org itself, the BeagleBone-X15 but that will be a very different design, also at a different price, certainly above $100. But also with lots of more extra’s 🙂 It should arrive in the coming months.
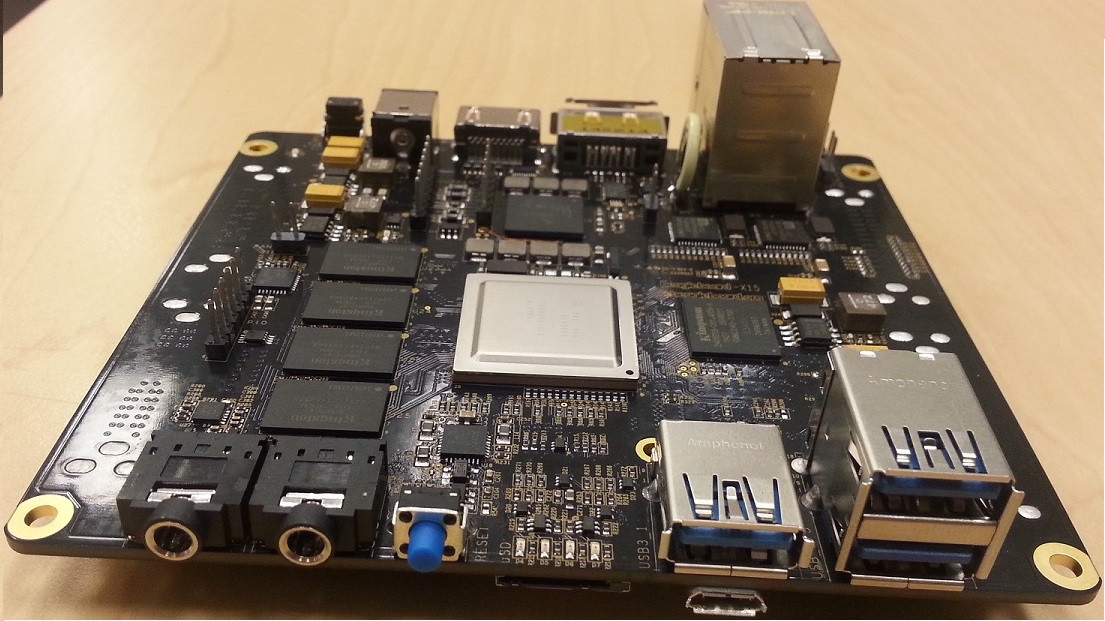
BeagleBone-X15BeagleBone-X15 Beta board image.

More news when it happens. There surely is a lot happening on the BeagleBoard.org side of things. This update could have been a full post in itself!

Update 3: (2015-05-08) New blogpost with more info.

Update 4: (2015-05-16) The board is presented, see here for the info.

Update 5: The story continues in part 4.

Buildparty Düsseldorf Report

The build party was another big success, the 7 participant teams built themselves a brand new Reprap “Prusa i3“.
The people from GarageLab were very helpful, and have a nice space to work at. We used the coworking space rooms to do our building. Thanks to Daniel Bruns and Carsten Born, they helped out a lot. Also thanks to Lab maintainer Axel Ganz for helping setting things up, and Yvonne Firdaus, the Coworking Space / GarageLab owner.

We had a lot of help from the community people attending, there is a lot of information to be had when you are in a room with Kliment Yanev, Josef Prusa, Joachim Glauche, Nathan Zadoks and Ruben Lubbes. Also there was a group of locals working on their Reprap’s in the fablab itself, there were a few machines from our earlier parties present. It was nice seeing them improve the machines, and using them a lot.

We built a reasonably new model, the Prusa i3, and it is a big improvement in building the machine. That was also one of the reasons the machines are so quick to be in use, most of the people were printing at the start of sunday afternoon, and everyone printed a model that looked pretty nice.

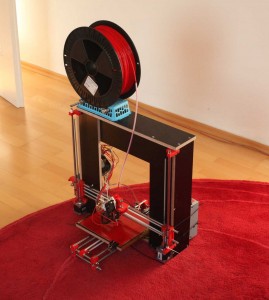
The i3 is different from the model we used in our previous courses because it now uses a wooden box-frame that is very stiff, stable, and easy to build. Also it moves the motors to the bottom of the machine, so the Z-axis does not hang from the motors anymore. Also the amount of noise the machine makes is lower, and cable management is improved. Also the spool mount is integrated on top of the machine.This makes the i3 a very good option to build as your next Reprap. The design is still in developement, so for now the build info is still incomplete.

We did most of the building in the first day, and were mostly doing the last part of the electronic setup on sunday morning. The electronics we used were ReprapDiscount RAMPS system, and jhead hotends. Most of the other parts were sourced at ReprapSource. Both of these performed very well. Around lunch most of the people were getting ready to print, and we made some cool models in the afternoon.

Then we also did some presentations on the history of the project, getting help from the community, and some info on how to do 3D modelling with OpenSCAD.

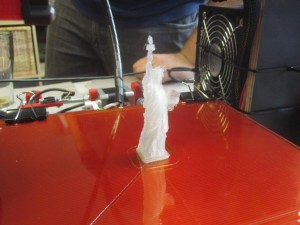
2nd print on a newly built Reprap

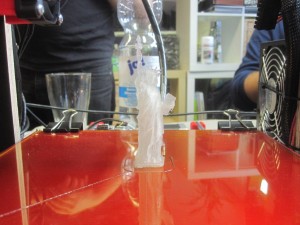
Just look at this 7,4cm tall Statue of Liberty, it is not very visible because of the background and transparent material, but the crown is really very nice. I hope we will get more pictures of that soon.

2nd print of the new Reprap, different angle

Some pictures are already available here, but i hope to see more soon.

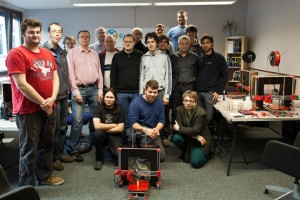
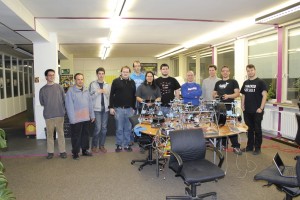
And this time we managed to do a group picture again, so here it is!

There was even an interview done with me by Josef Prusa in his series of interviews, see it here

And finally: a timelapse of the build!
[youtube_sc url=1Lxe34VohlQ]

I would like to personally thank Axel Funke, for driving me home afterward although he had to go a totally different direction to get home himself!

We will be doing more of these buildparties, so if you want to organise one in your town or hackerspace, contact us!

Prusa interviews me in Düsseldorf

During the Reprap BuildParty in Düsseldorf Josef Prusa did an interview with me in his series of interviews about Reprap and the community, and he posted it to Youtube.

In the interview we talk about me finding the project, collecting reprap memorabilia, my island promotion of Reprap, the history of IkMaak, why the courses are organised, and the way progress in the project is made. I’m rambling a bit, but i did not prepare for the video, so have fun!

[youtube_sc url=HcCO_aSkhJI]

The FrankenBot project is also mentioned, if you want to join in with a part for that, get the part from the list, do anything you like with the design, as long as it is still functional, print it out, sign it, add some documentation, and send it to me! Contact me for more info.
I hope you like the interview, there’s more where they came from. They are featured after the break.
Continue reading Prusa interviews me in Düsseldorf

Reprap Buildparty Düsseldorf

Another Reprap Buildparty is set to be held at the GarageLab in Düsseldorf on 27-28 october!
A unique chance to build your own Reprap 3D printer in just one weekend.
You will get all the parts and guidance from some of the most experienced reprap builders in the community.
The machine being built is the Prusa i3, a recently developed but well-tested version of the popular Reprap type of 3D printers.

update: First pictures are here

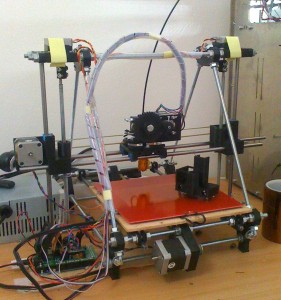
The new Prusa iteration 3 model, the machine that is being built.

With the help of will build the machine on the first day of the event and finish it on the morning of the second day. After that we will look into the workings of the machine, and how to operate the software.
It is possible and even recommended to come as a team of two or more for extra fun. Josef Prusa, Kliment Yanev, Joachim Glauche, Ruben Lubbes and other community members will be there to help you.

The course is given in German/English, but Dutch speaking community members are available.

More information is available in German at the infopage of the GarageLab

Most places are taken, but it is still possible to join! Registration is at verein (at) garage-lab (dot) de

Also, if you are looking for another date, location, or other request, this can be taken into account, just mail us at info (at) ikmaak (dot) nl.

Workshop data:
Time: 27th and 28th of October 2012.

Location: GarageLab
Bilker Allee 217
40215 Düsseldorf
Deutschland

Price: 850€ per printer. 1 or 2 builders per machine.

Included in the course price are all the parts as well as some plastic print material. The electronics, hotend, and cable terminations will be done for you in advance. Food and drinks are included for up to two participants.

Required tools:

  • Laptop
  • Extension cord
  • Set of hexagonal keys (allen keys) including small sizes
  • Screwdriver set
  • Wrenches in sizes 13 (ideally two pieces), 7 and 5.5
  • Electronics pliers set (at least needle nose and side cutters)
  • Tweezers
  • 8mm round file

Note that we have all these tools available onsite, but not enough for everyone. Please bring your own set of tools if at all possible.

Photos of past build events are available at http://ikmaak.nl

This info is also available on our events page

RepRap Buildparty Berlin

Another RepRap buildparty is going to take place in Berlin, Germany on the 18-19th of February (18-19-02-2012). Ten groups will have the opportunity to build their very own 3d printer, get it working, and take it home with them.

Under the guidance of Josef Prusa, Kliment Yanev, Joachim Glauche and Ruben Lubbes, we’ll build ten printers of the latest Prusa Iteration 2 variety. More info on Prusa iteration 2 at Prusa Iteration 2

After building the printers, we’ll look at control and design software, basic troubleshooting, and where to get designs, ideas, and help. At the end of the workshop, every participant or group will go home with a working printer.

Here is a video of an earlier workshop organized by the same team:

[youtube_sc url=qq7roeoTM9g]

Workshop data:
Time: 18th and 19th of February 2012, from 10.00h to 19.00h on both days. Impatient builders may continue past 19h on Saturday if they wish to, but that should not be necessary.

Location: Change in venue, switch to IN-Berlin, Lehrter Str. 53, Berlin, Germany (Hackerspaces.org info)

Price: 850€ per printer. The number of participants per printer is not limited (though 2-3 is ideal).

Signup by email, info @ ikmaak.nl

Included in the course price are all the parts as well as some plastic print material. The electronics, hotend, and cable terminations (the boring bits that eat a lot of time) will be done for you in advance.

Required tools:

  • Laptop
  • Extension cord
  • Set of hexagonal keys (allen keys) including small sizes
  • Screwdriver set
  • Wrenches in sizes 13 (ideally two pieces), 7 and 5.5
  • Electronics pliers set (at least needle nose and side cutters)
  • Tweezers
  • 8mm round file

Note that we have all these tools available onsite, but not enough for everyone. Please bring your own set of tools if at all possible.

Photos of past build events are available at http://ikmaak.nl

This info is also available on our events page here

Are you not able to come to Berlin, but would liketo have one of these buildparty’s in your town, contact us too, so we can provide you with the options of having one. It is a great community builder!

Build Party Cologne Report

We have been having a great time on the first day of the course, doing almost all of the construction of the machines in one day. The Coworking Space Cologne/DingFabrik is where the event is being held is very nice, and very active, they organise meetings on friday evening, so come by when you are near!

All the participants made the whole machine frame, hotend and other electronics, including hotend and heatbed, and even endstops. We mounted 2 already, only needing to attach the Z axis Hall-0 Endstops on day 2.

This is a new record for us! First time builders making a machine almost entirely on one day! 🙂 We tried a new order of putting the parts together, so the difficult parts were done first, and then the frame would be setup as late in the process as possible. This way the progress is easyer to see, and you dont setup things wrong first, only to repair them later.

We have made a lot of pictures, more are on their way from the participants themselves, and others. First set is in: Thomas Feldmann’s pics

We used different hotends this time, with IRC resident “jreifsnyderb” sponsoring hotends. We have used his J-Head Mk III-B, instead of the standard MakerGear ones we normally use in our build party’s. The buildup of these hotends is very easy, as they also come with groovemount, and are almost fully assembled.

The second day was a bit more difficult, we spent most of it installing the software, as almost every machine was running a different OS. After that we could print some parts on every machine, and i think all people left with the feeling they had a good start in the world of RepRaps. We also built a RepRap for use in the DingFabrik, so they will have one there from now on.

Also we had a visit from Fabienne, who will build one of our kits soon, and hopefully be printing out parts in no time 🙂

We will update this post soon to add the software package we used to provide the people with during the course. We used the Marlin Firmware on the bot, and Pronterface with Slic3r on the PC’s.

Reprap Prusa Iteration 2 Build Event in Cologne Germany in December

German description at dingfabrik.de

A reprap build workshop is going to take place in Cologne, Germany on the first weekend of December (3-4.12). Ten groups will have the opportunity to build their very own 3d printer, get it working, and take it home with them.

Under the guidance of Josef Prusa, Kliment Yanev and Ruben Lubbes, we’ll build ten printers of the latest Prusa Iteration 2 variety. More info on Prusa iteration 2 at Prusa Iteration 2

After building the printers, we’ll look at control and design software, basic troubleshooting, and where to get designs, ideas, and help. At the end of the workshop, every participant or group will go home with a working printer.

Here is a video of an earlier workshop organized by the same team:

[youtube_sc url=qq7roeoTM9g]

Workshop data:
Time: 3rd and 4th of December 2011, from 10.00h to 19.00h on both days. Impatient builders may continue past 19h on Saturday if they wish to, but that should not be necessary.

Location: Coworking Space Gasmotorenfabrik, 3rd floor, Deutz-Mülheimer Str. 129, 51063 Cologne, Germany

Price: 850€ per printer. The number of participants per printer is not limited (though 2-3 is ideal).

Signup by email, kliment.yanev @ gmail.com

Included in the course price are all the parts as well as some plastic print material. The electronics, hotend, and cable terminations (the boring bits that eat a lot of time) will be done for you in advance.

Required tools:

  • Laptop
  • Power block
  • Set of hexagonal keys (allen keys) including small sizes
  • Screwdriver set
  • Wrenches in sizes 13 (ideally two pieces), 7 and 5.5
  • Electronics pliers set (at least needle nose and side cutters)
  • Tweezers
  • 8mm round file

Note that we have all these tools available onsite, but not enough for everyone. Please bring your own set of tools if at all possible.

Photos of past build events are available at http://ikmaak.nl

Pictures of the event in Cologne are here!

Cartesio

Cartesio is a printed multi-purpose desktop CNC machine, with a working space of 300x200x100mm(X,Y,Z).
The machine is designed to hold multiple tools at its toolhead.
This way one could connect a mill and/or a 3Dprint extruder and/or ….

Cartesio is constructed from lightweight aluminium extruded profiles.
These give the machine a very rigid construction, and alow for easy configuration of the machine.
So if you want to change anything, i.g. the Z axis to a much longer configuration, it can be done very easily.

The axis are powered by 3 NEMA23 steppers.
These drive trapezoidal spindles that move 3mm per rotation.
With these spindles you can generate a huge amount of power.
The max feedrates, are 2400mm/min for X and Y, and 660mm/min for Z.

The workspace only moves in Z-axis direction, and is supported on all 4 sides.
This gives a very rigid workplane that does not move fast in X or Y direction.
This is done, so that larger objects will not have stress/torque from (de)acceleration.

The “gantry” type X and Y-axis make sure that a wide variaty of tools can be mounted to the toolholder.
This kind of setup can result in a toolchanger in the future.
At the moment a proxxon engraving tool (thankfully donated by Hegner) is mounted to the toolhead, together with the new 3Dprint Extruder.

RepRap improvements I – Hall-0 endstop

We would like to tell about some of the improvements we and others have made on the “traditional” RepRap design (traditional being last week?).
That is why we will start this series. So here we go!

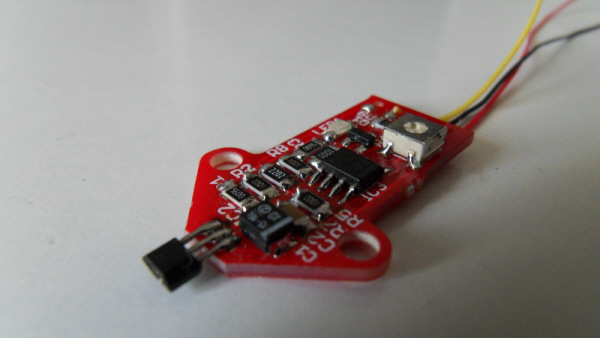
One of the problems we have found while operating the machines here is the problem that it is difficult to get the Z height precisely right. While using opto or mechanical endstops you also run into different problems like bumping out of position or light influence. That is why our teammember Jos from Mauk.CC designed the Hall-O endstops. It is a contactless magnetic sensor, with a much higher precision than normal endstops. This enables us to set this once, and then forget about it untill the next retrofit of improvements.

These endstops can be used as a drop-in replacement of other endstops, in all RepRap variants, and all other (cartesian) systems that need the precision. See the adapted endstop mount for easy mounting. They can be used on RAMPS, Sanguinololu and more. They make most sense on the Z axis on a RepRap, but for other machines this could vary, depending on the needed precision on these machines.

Hall-0 Endstop

It measures the distance to the magnet, so it can be set to trigger digitally at a set distance from the endstop, between 2-4mm with the standard magnet. The distance can be configured by the trimpot. This way it will not interfere with the movement or placement of the endstop, and it will keep in place without problems. It could also be used as a analog measurement device, but the current hardware and firmware used by the project do not allow for that yet. The endstop contains the endstop, a mounting cable, and a magnet, enough to get your Z height precisely defined. We have gotten a lot of them in the world already, so maybe we will see some reviews by others soon.

As we would like to see this into the hands of as many RepRappers as possible we have made them also available via our site, mail us at info at ikmaak.nl and we will inform you of the cost of sending one or more. The price is 9 euro excluding postage. If you want to buy them in bulk please drop us a line as well 🙂

Tweede “IkMaak een 3D printer” cursus

English summary below.
Meer build-party info is te vinden op de Events pagina.

Wat is een 3D printer? Met een 3D printer is het mogelijk tekeningen uit de computer om te zetten naar fysieke voorwerpen.

IkMaak.nl organiseert de tweede 3D printer bouwcursus in Maastricht.

Bij deze cursus worden samen met de andere deelnemers en leden van de community tien 3D printers gebouwd, die de deelnemers daarna mee kunnen nemen voor eigen gebruik. De machines worden gebouwd in het weekend van 23-25 september. Er is een introductiebijeenkomst voor deelnemers op 10 september, waarin de te volgen procedure wordt uitgelegd.
De onderdelen van deze printer worden door ons verzameld, zodat iedereen dezelfde kit gebruikt, en we samen kunnen werken om dezelfde machine te maken. Hierdoor kan zich in korte tijd een community vormen, die samen de ontwikkeling en het gebruik van 3D printers kan bevorderen. Doordat dit low-cost en op persoonlijke titel gebeurt, is deelname goedkoop, maar geheel voor eigen risico. Het ontwerp is door veel mensen in gebruik, dus het is wel een beproefd model.
Het ontwerp is op veel punten verbeterd in de tijd sinds de vorige cursus, ons materiaal zal hiermee rekening houden. De printer die wij bouwen is dus anders dan die uit februari. Ook de software is inmiddels sterk verbeterd, dit zal ook worden behandeld, zodat iedereen bekend is met de laatste stand van zaken.

Het onderwerp van de cursus: De RepRap Prusa Mendel

Welke 3D printer?
Wij maken bij deze cursus gebruik van de Reprap printer. Reprap is een project waaraan veel mensen wereldwijd samenwerken om een 3D printer te ontwerpen en te bouwen. Op het moment is het populairste model de Prusa Mendel, een zo ver als mogelijk geoptimaliseerd ontwerp, dat veel sneller te bouwen is dan zijn voorgangers. Dit ontwerp is gemaakt door Josef Průša, een jonge Tsjechische ontwerper. Hij zal hopelijk een videobijdrage doen tijdens de cursus, vanuit Amerika, waar hij spreekt op de OSHW conferentie en MakerFair in New York. Verder zijn er bekenden uit de community uitgenodigd, zoals o.a. Kliment, die de documentatie voor de Prusa Mendel verzorgt. Meer info hierover volgt.

Wat kan je met een 3D printer maken?
Met een 3D printer is het mogelijk tekeningen uit de computer om te zetten naar fysieke voorwerpen. Het voorwerp wordt opgebouwd uit een dunne plastic sliert, daar wordt een tekening mee gemaakt, en daarna een volgende tekening erbovenop. Hiermee bouwt het model zich laag voor laag op, totdat het de vereiste hoogte bereikt is.
Ontwerpen hiervoor zijn met 3D modelling te maken, of te downloaden op Thingiverse, een soort Wikipedia van voorwerpen. Hierdoor is het mogelijk ontwerpen van internet te downloaden, en die op de printer werkelijkheid te laten worden. Het modelleren is geen deel van deze cursus, maar bij interesse kan dit in een volgende cursus behandeld worden. Omdat het gehele RepRap ontwerp open source is, kunnen verbeteringen aan de printer vaak zelf uitgeprint worden, en zo wordt de printer steeds beter. RepRap is een van de meest vooraanstaande open source hardware projecten.

LET OP! De plaats in de cursus is beperkt, slechts 10 in totaal, en al deels ingevuld. Inschrijving is pas geldig als de kosten zijn betaald. Aanmelden/informatie vragen kan door middel van een mail naar info at ikmaak punt nl. Als de plaatsen zijn opgevuld maken wij een lijst voor volgende cursussen, dus geef ook aan of je hierin geïnteresseerd bent.

De belangrijkste info op een rijtje:
Wat: 3D print bouw-workshop
Waar: FabLab Zuid-Limburg in Maastricht
Data: Bouwen 23-25 september, Introductiebijeenkomst voor deelnemers 17 september om 19.00 in FabLab Zuid-Limburg
Kosten: 850 euro, best te betalen tijdens de introbijeenkomst.
Aantal deelnemers: 10 machines, 1-2 deelnemers per machine.
Inbegrepen: Alle onderdelen voor de machine, printmateriaal.
Zelf meenemen: Laptop, Gereedschap.
Praktische vaardigheden: Enthousiasme, technisch inzicht, doorzettingsvermogen, precisie.
Waarschuwing: Alles is op eigen risico, wij doen ons best, maar zijn niet verantwoordelijk voor enig ongeval etc.
Waar moet je nog meer op letten? Het gaat niet om een commercieel product, maar om een door mensen bedachte en uitgevoerde kit. Hoe beter je m in elkaar zet, hoe beter hij print.
Opties: Gereedschap heeft niet iedereen, wij kunnen die ook proberen te kopen voor meerdere deelnemers. Verder kunnen we ook materialen extra regelen, zoals printmateriaal, etc.
Projectpagina: Alle info is terug te vinden op: https://ikmaak.nl/eenblog/2011/09/07/tweede-3d-printer-cursus-maastricht/
Aanmelden: Aanmelden kan middels een mailtje naar info at ikmaak punt nl of ruben.lubbes at gmx dot net.
Let op, deze pagina wordt regelmatig aangevuld, houd hem in de gaten.

Tijdsschema cursus:

Vrijdag: 19.00 – 22.00+ Introductie en mechanische opbouw

Zaterdag: 10.00 – 19.30 Mechanisch af bouwen en elektronische aansluiting

Zondag: 10.00 – 19.00+ RepRap afstellen en software uitleg.

Op zaterdag is er ook een gezamenlijk etentje met de deelnemers, om zo in een andere omgeving na te kunnen praten. Dit wordt georganiseerd in een naburig restaurant, maar is optioneel, en niet inbegrepen.

We hebben iemand die voor eten etc. zorgt, dus tijdens de cursus is voldoende eten aanwezig. Heb je speciale eetwensen of eisen, geef dit dan door, dan kan hiermee rekening worden gehouden.

Er zijn foto’s van de vorige cursus te vinden op IkMaak Foto’s in Maastricht

Gereedschap:

Stekkerblok met overspanningsbeveiliging
Schuifmaat (electronisch)
Schroevendraaiers
Hotglue pistool
Kleine tangenset
Draadstripper
Breekmes
Vijltjes (vooral rondvijl)
Imbus voor M1,5-M3-M4-M5
Steeksleutel voor M3-4-8
Zaklamp
Pincet
Optioneel:
IJzerzaag
Soldeerbout/tin/etc
Dremel

Engelstalig:
IkMaak.nl organizes the second 3D printer building course in Maastricht, The Netherlands.
At this course the participants will build their own printer, for a total of 10 machines. We will build the Prusa Mendel, recently the most popular open source hardware 3D printer by the RepRap project. The design of the printer has changed a lot since our courses in february, so our machine will reflect that.
This weekend-course will be from 23-25 september 2011, with a info-meeting on the 10th of september.
We will have a videopresence with the designer of the Prusa Mendel, Josef Průša. This is a young Czech designer, who is a driving force in the project a.t.m. He has been invited to give a speech on the OSHW conference and Maker Fair New York, so he cannot be with us this time. Kliment and other community members will be coming over during the build weekend, and help participants build and tune their bots. Community members wanting to help out, can contact me at info at ikmaak dot nl. Also use this adress for other requests or offers 🙂 More info added soon, follow this page.